- Tableau Public (Free)
- Tableau Desktop (Commercial)
Here is a detailed comparison between the two
| Tableau Desktop | Tableau Public | |
|---|---|---|
| Pricing | Personal Edition – $35 per month Professional Edition – $70 per month | Free and Open Source |
| Data Source Connection | Connect to any data source files including databases, web applications and more | Connect to Excel and text files |
| Publish/Save | Can be saved as a local file and can be published in Tableau Server and Tableau Online | Can be published only in Tableau Public profile |
| OS | Windows and Mac | Windows and Mac |
| Security | Data and Visualizations are secured | Data and visualizations are not secured as it is available in public |
| Usage Details | Professional and Enterprise level | Personal level |
| Data Extract | Data can be extracted from various data sources and stored as Tableau extract file | Data cannot be obtained from different data sources as it is limited to connect only excel and text files. |
Note: To execute the examples in these tutorials, you will need access to Tableau Desktop. We will go through the steps the install Tableau Desktop on a Windows Machine. It has a 14-day trial.
In this tutorial, you will learn
- Download and Install Tableau Public
- Download and Install Tableau Desktop
- Introduction to Tableau Desktop Software Workspace and Navigation
Download and Install Tableau Public
Step 1) Go to https://public.tableau.com/en-us/s/download on your web browser. Now you need to enter your email id and click on “DOWNLOAD THE APP” button.

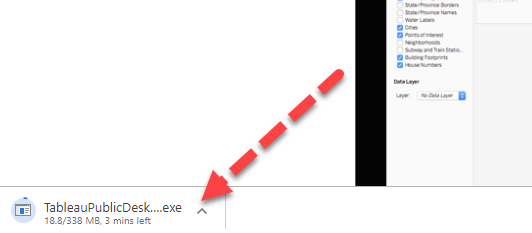
Step 2) This will start downloading the .exe file for Windows by default, and you can see the downloading process in the bottom left corner of the website.
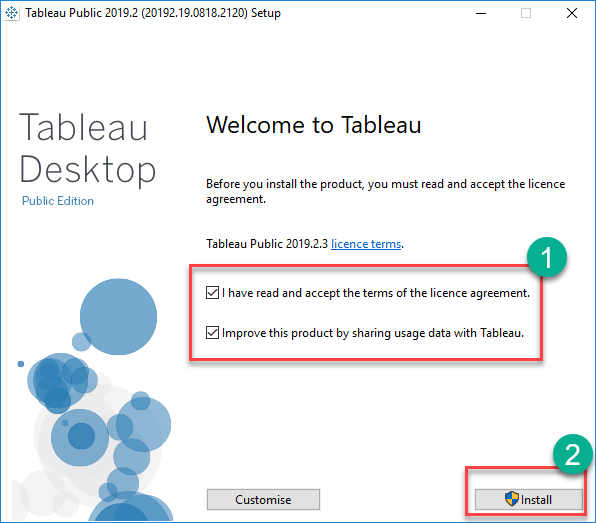
Step 3) Open the downloaded file. Accept the terms and conditions and click on “Install” button.
Step 4) After installation Start Screen of Tableau is shown

Download and Install Tableau Desktop
Step 1) Go to https://www.tableau.com/products/desktop on your web browser.

Step 2) Click on the “TRY NOW” button shown in the top right corner of the website.

Step 3) It will redirect to the page where you need to enter your email id and click on “DOWNLOAD FREE TRIAL” button.

Step 4) This will start downloading tableau latest version. An .exe file for Windows is downloaded, and you can see the downloading process in the bottom left corner of the website.

Step 5) Open the downloaded file. Check in to accept the terms and conditions and click on “Install” button.

Step 6) A optional pop-up message will be shown to get the approval of Administrator to install the software. Click on “Yes” to approve it. Installation of the Tableau Desktop on Windows system starts
Step 7) Once the installation is completed, open the Tableau Desktop software.
Step 8) In the Registration window
- Click on Activate Tableau and entire your license details
- If you do not have a license, enter your credentials
- Click on Start Trial now

Step 9) Wait for registration to complete

Step 10) Start Screen of Tableau is shown

Now you are all set to use the Tableau Desktop in your windows system.
Introduction to Tableau Desktop Software Workspace and Navigation
In the start screen, go to File > New to open a Tableau Workspace
The Tableau Desktop Workspace consists of various elements as given in the figure:

Menu Bar:
It consists of menu options such as File, Data, Worksheet, Dashboard, Story, Analysis, Map, Format, Server, and Windows. The options in the menu bar include features such as file saving, data source connection, file export, table calculation options, and design features for creating a worksheet, dashboard, and storyboard.
Toolbar Icon:
Toolbar icon present below the menu bar can be used to edit the workbook using different features such as undo, redo, save, new data source, slideshow and so on.
Dimension Shelf:
The dimensions present in the data source can be viewed in the dimension shelf.
Measure Shelf:
The measures present in the data source can be viewed on the measure shelf.
Sets and Parameters Shelf:
The user-defined sets and parameters can be viewed in the sets and parameter shelf. It can also be used to edit the existing sets and parameters.
Page Shelf:
Page shelf can be used to view the visualization in video format by keeping the relevant filter on the page shelf.
Filter Shelf:
The filters that can control the visualization can be placed on the filter shelf, and the required dimensions or measures can be filtered in.
Marks Card:
Marks card can be used to design the visualization. The data components of the visualization such as color, size, shape, path, label, and tooltip used in the visualizations can be modified in the marks card.
Worksheet:
The worksheet is the place where the actual visualization can be viewed in the workbook. The design and functionalities of the visual can be viewed in the worksheet.
Tableau Repository:
Tableau repository is used to store all the files related to tableau desktop. It includes various folders such as Bookmarks, Connectors, Datasources, Extensions, Logs, Mapsources, Services, Shapes, TabOnlineSyncClient and Workbooks. My Tableau repository is usually located in the file path C:\Users\User\Documents\My Tableau Repository.

Tableau Navigation
The navigation of workbook is explained below.

Data Source:
The addition of new data source of modification of existing data source can be done using the ‘Data Source’ tab present at the bottom of the Tableau Desktop Window.
Current Sheet:
Current Sheet can be viewed with the name of the sheet. All the sheets, dashboards and story board present in the workbook can be viewed here.
New Sheet:
The new sheet icon present in the tab can be used to create a new worksheet in the Tableau Workbook.
New Dashboard:
The new dashboard icon present in the tab can be used to create a new dashboard in the Tableau Workbook.
New Storyboard:
The new storyboard icon present in the tab can be used to create new storyboard in the Tableau Workbook.

No comments:
Post a Comment