Custom labels are custom text values that can be accessed from LWC Component, Aura Component, Apex classes, Visualforce pages. The values can be translated into any language Salesforce supports. Custom labels enable developers to create multilingual applications by automatically presenting information (for example, help text or error messages) in a user’s native language.
In this post we will see how to use custom label in LWC component. If you want to add custom label in aura component please refer Custom Labels In Lightning Aura Component
Create Custom Labels
Go To Setup — Create — Custom Labels. Click on New Custom Labels. Enter value for name, value and description. We can use custom label name to access custom label value in apex code using System.Label.labelName
The advantage of using a custom label is that label will be displayed to user depending on their language automatically. We need to specify translation for label using translation workbench.
Use Custom Labels in LWC
Using custom label in LWC is easy. To import a label in a Lightning Web Component JavaScript file, use @salesforce/label in an import statement.
import labelName from '@salesforce/label/label-reference';
- labelName: It is name that refers to the label in LWC.
- labelReference: The name of the label in your org in the format namespace.labelName. If there is no namespace then simply use labelName.
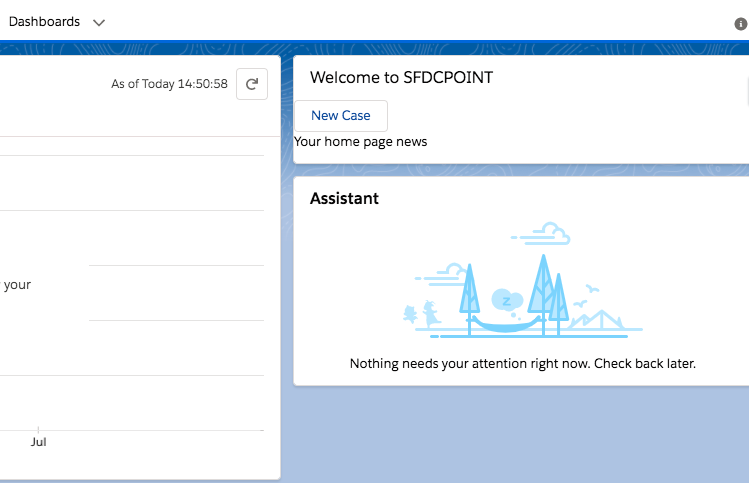
Custom Labels In Lightning Web Component(LWC) Example
First, let’s create 3 labels from Setup — Create — Custom Labels. Click on New Custom Labels. Enter value for name, value and description.
- WelcomeNoteLabel: Welcome to SFDCPOINT
- HomePageNewsLabel: Your home page news
- NewCaseLabel: New Case
Now create new lightning web component with name customLabelExampleLWC. Here is code
customLabelExampleLWC.html
<template>
    <lightning-card  title={label.WelcomeLabel} variant="narrow">
        <p>
            <lightning-button label={label.NewCaseLabel}></lightning-button>
        </p>
        <p>{label.HomePageLabel}</p>
    </lightning-card>
</template>
customLabelExampleLWC.js
import { LightningElement } from 'lwc';
// importing Custom Label
import WelcomeLabel from '@salesforce/label/c.WelcomeNoteLabel';
import HomePageLabel from '@salesforce/label/c.HomePageNewsLabel';
import NewCaseLabel from '@salesforce/label/c.NewCaseLabel';
export default class CustomLabelExampleLWC extends LightningElement {
    label = {
        WelcomeLabel,
        HomePageLabel,
        NewCaseLabel
    };
}
customLabelExampleLWC.js-meta.xml
<?xml version="1.0" encoding="UTF-8"?>
<LightningComponentBundle xmlns="http://soap.sforce.com/2006/04/metadata">
    <apiVersion>48.0</apiVersion>
    <isExposed>true</isExposed>
    <targets>
        <target>lightning__AppPage</target>
        <target>lightning__RecordPage</target>
        <target>lightning__HomePage</target>
    </targets>
</LightningComponentBundle>
Now we can add this lwc component on home page.
- Go to Home page
- Click Setup (Gear Icon) and select Edit Page.
- Under Custom Components, find your modalPopupLWC component and drag it on right-hand side top.
- Click Save and activate.
We will get the following output

No comments:
Post a Comment