Saturday, September 16, 2023

What is a flow in Salesforce?

Lightning flows (or simply flows) help you automate complex business processes and manual data entry. Flows let you work smarter, not harder, by saving your users time and making sure the required tasks are accomplished correctly.

As a Salesforce admin, flows are one of the most powerful tools in your toolbelt — when set up properly, flows make you look like a rockstar to your sales team, but if your flows aren’t configured correctly, they might be difficult to manage or make a mess (also kind of like a rockstar).

This guide will teach you everything you need to know about flows. Let’s dive in!

What is a flow in Salesforce?

In Salesforce, a flow is a tool that automates complex business processes. Simply put, it collects data and then does something with that data.

Flow Builder is the declarative interface used to build individual flows. Flow Builder can be used to build code-like logic without using a programming language.

Flows fall into five categories:

Screen Flows:

  • These are flows that have a UI element and require input from users. These types of flows are either launched as an action or embedded as an element on a Lightning page.

Schedule-Triggered Flows:

  • These autolaunched flows launch at a specified time and frequency for each record in a batch, and they run in the background.

Autolaunched Flows:

  • Run automated tasks with this flow type. Autolaunched flows can be invoked from other flows (subflow), process builder, from within an Apex class, from a set schedule, from record changes, or from platform events.

Record-Triggered Flows:

  • These autolaunched flows run in the background either before a record save or after the record is saved when a record is created, updated, or deleted.

Platform Event-Triggered Flows:

  • When a platform event message is received, these autolaunched flows run in the background.

Check out this example of a schedule-triggered flow, pulled from a well-known Salesforce group:
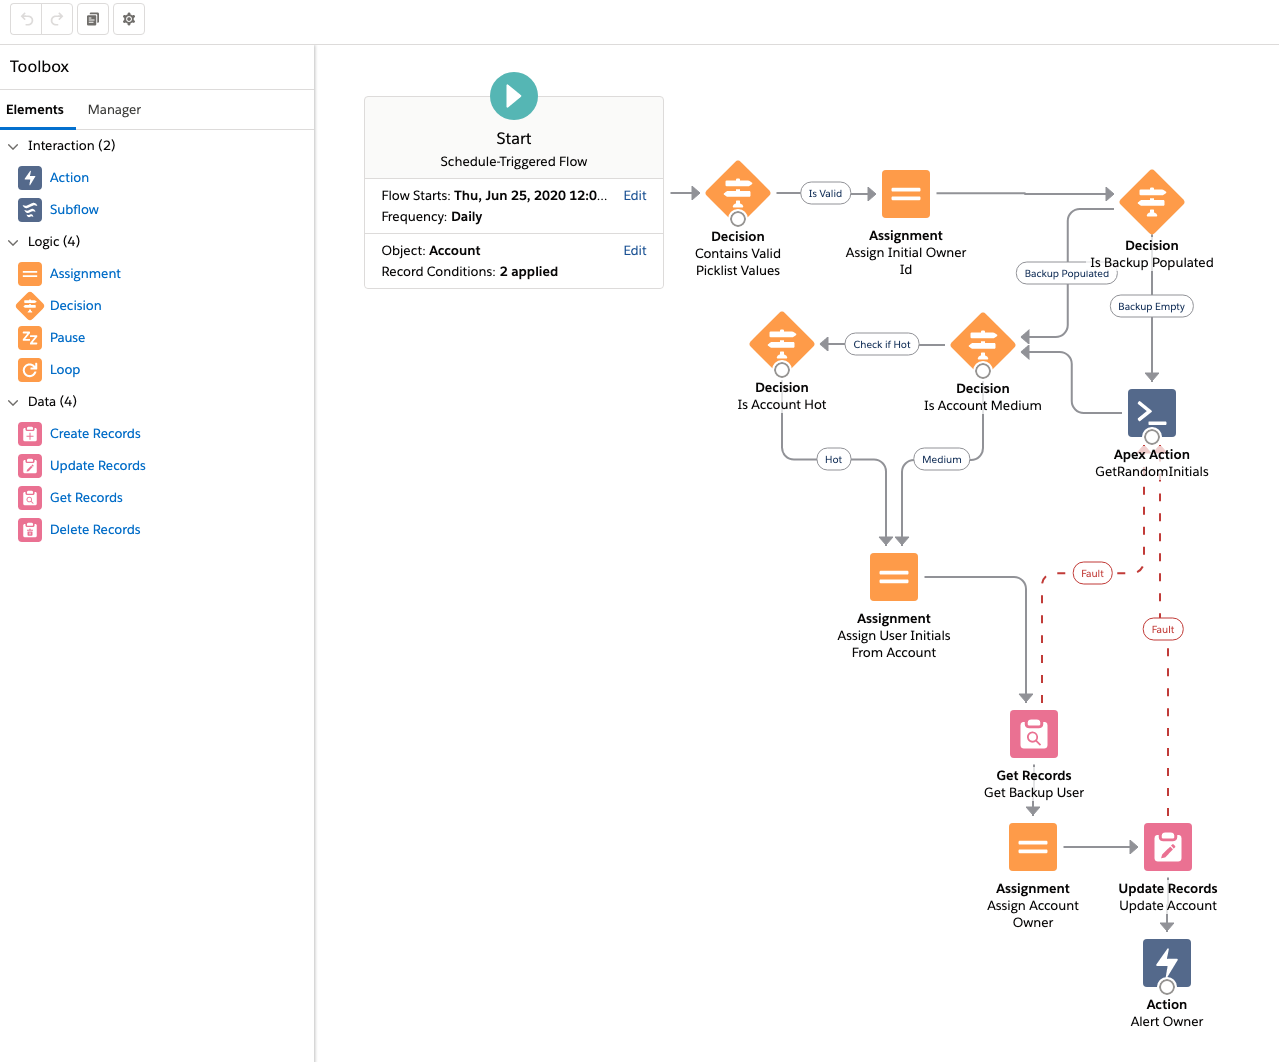
Screen Shot 2020-08-14 at 10.40.54 AM.png


When/why should I use a flow?

If you need to generate a new automated business process, or user guided experience that does not reach the complexity threshold for Apex Code, then flow is your go-to tool. If you are modifying an existing process that was built with Process Builder or workflow, then you should consider a number of factors when deciding whether to modify the existing process or migrate it to Flow. 

Flows are able to create, edit, and delete records in Salesforce, send emails, show relevant data and gather input from users, and generate outbound messages.

When should I not use a flow?

Generally, you should not use a flow in the following situations:

There is complicated logic involved that is better managed with Apex code. An example of this is the flow shown in the Overview section. The logic in this flow is so complicated that it makes debugging a pain, plus it makes documenting and managing the flow difficult.

Your Salesforce edition limits how many flows you can create. Note, it is possible for developers to write Invocable Apex methods that you can call from a flow (similar to calling a subflow). Using this pattern, you can offload especially complex processes to Apex, but still have your flow builder maintain control of the overall process!

Essentials and Professional editions of have a limit of five processes (per process type) and flows (per flow type) in each organization. For most logic in these editions, it is easier to use a process.

How do I create a flow in Salesforce?

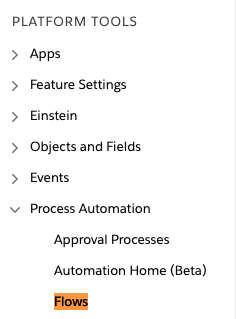
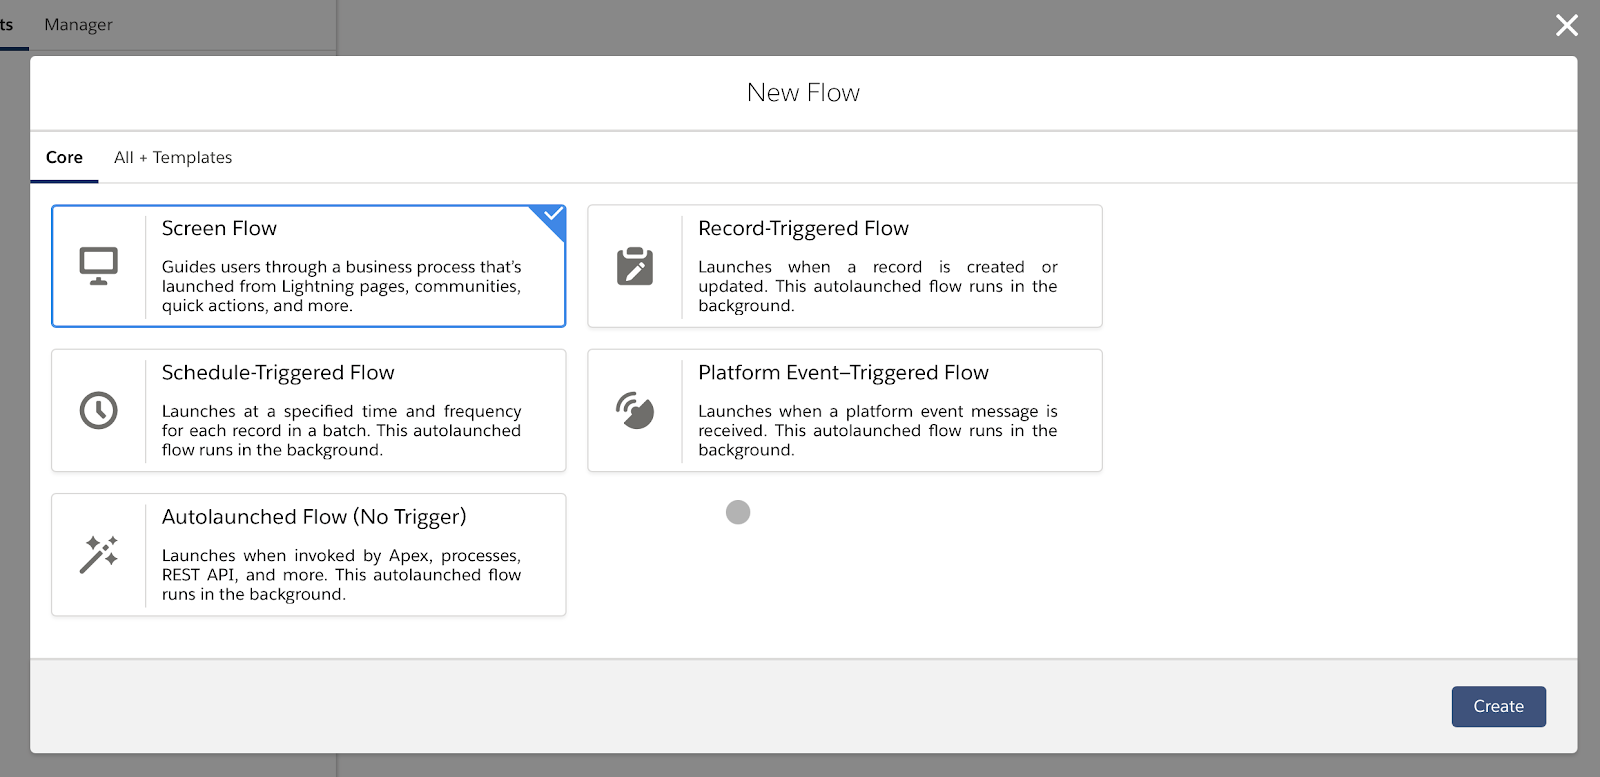
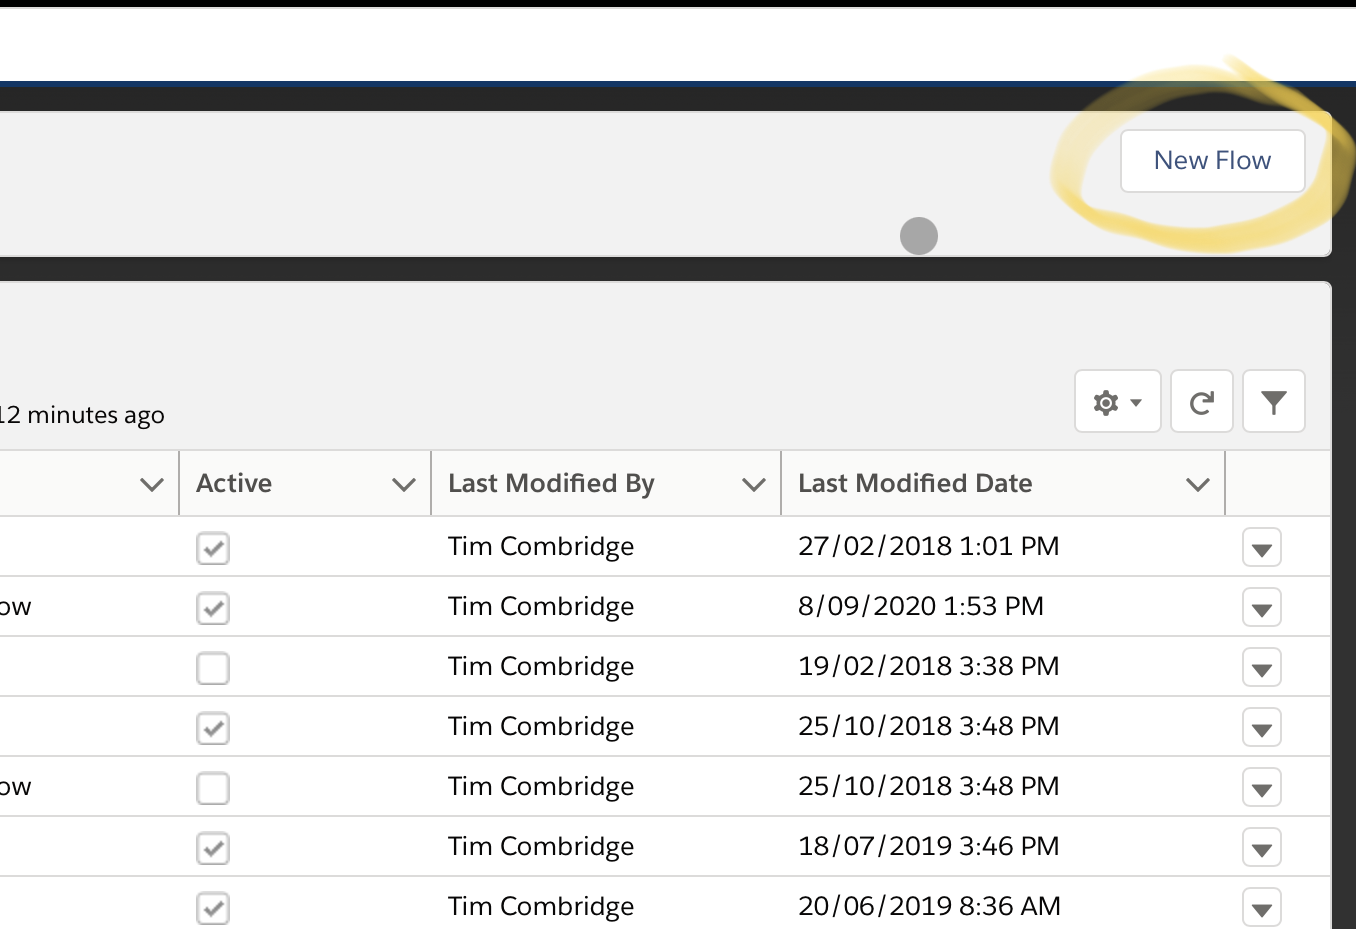
Open Flow Builder. From Setup, enter “Flows” into the Quick Find box, select Flows, and then click New Flow. Select the Flow Type, then click Create.

The type of flow you create will impact your experience. For scheduled and record triggered flows, you can access an auto created global variable called $Record. This gives you access to all of the fields on the record that triggered the flow(and its parent records!!!). If you create an autolaunched flow, you’ll have to create any required input variables yourself.

Once you get your inputs setup, you can click the ‘+’ button after the start element - you will have a choice elements to carry out your business processes. Each element represents an action that the flow can execute. Examples of such actions include reading or writing Salesforce data, displaying information and collecting data from flow users, executing business logic, or manipulating data.

(For some more detailed flow building examples - subscribe to our newsletter! Just scroll to the bottom of this page to find the signup link.) 

Save your flow.

After you build a flow, make sure that it’s working correctly by thoroughly testing it. Once you’ve tested it, activate the flow. You’re now ready to distribute the flow to users.

Pro tip: Flows can be executed in several ways, depending on who the flow is designed for. Internal users, external users, or systems can run a flow, or a flow can be deployed for another organization. Just remember, no matter how you execute it…you’ve got to go with the flow.

Flows vs. Apex

Apex code requires a developer and Sandbox to deploy, meaning it can only really be built in organizations using a Professional or above edition of Salesforce. Flows can be built in all editions. While a Sandbox is not required to get a flow into a production environment, it is advisable that flows that leverage the full power of the tool are built and tested in a sandbox before being deployed to production.

Apex is not available in Essentials, and some Apex features are limited in Professional. Organizations with Enterprise and above have no Apex limitations, but flow features are not limited based on the edition. Apex code requires constant development and discipline to maintain. Flows require less work to keep up-to-date.

Flows can be built by admins, while Apex code is typically built by developers only. Apex code is considered a tool of last resort. Flows are simpler and should be used before Apex code.

If the logic is too complex, Apex code should be used. Each release brings new features that reduce the use cases that require Apex, but there are still some situations where Apex will bring a performance boost and should be considered.Renewal generation, Opportunity Product, and other pieces of automation that were traditionally built as Apex code can now be built as flows, preserving code space for projects that require Apex. 

Apex code should be used in the following scenarios:

  • Your flow requirements require nesting loops
  • Your flow requirements require get elements inside a loop
  • You are working with very large data volumes
  • You need custom-built integrations with other systems (such as a connection to a SQL database that requires bi-directional syncs).
  • ERP integrations are involved.
  • You need to log or present a custom error message if the automation fails or doesn’t find what it’s looking for. (However, you can do this in some cases with flow!)

Considerations for migrating from Process Builder to Flow:

With the Winter 23’ release, admins are no longer able to make new workflow rules, and Process Builder will be soon to follow. New automation should be built in Flow and migrating existing workflows and processes should be a strong consideration. Changing existing automation comes with its own risk. Consider the following when determining the right time to make the move.

Situations that indicate you should migrate soon:

  • You have more than one process builder per object
  • Your existing processes often fail or create errors
  • Your existing processes are simple
  • You are introducing a significant amount of new functionality
  • You have well designed acceptance criteria to test your new automation against your existing processes

Situations that indicate you should consider holding off your migration:

  • You have complex, stable processes that meet current business needs
  • You do not have clear testing requirements to confirm your new Flows replace the migrated workflows and processes. 

Testing flows

To test a flow, click the Debug button on the canvas, input your variables, and click Run. Then run through the flow to make sure it works properly. This process is especially helpful with screen flows.

Note that as of the Winter 2021 Salesforce release, a beta feature called Debug on Canvas is available. This feature makes flow debugging easier by visually demonstrating the path your flow will take when it runs. It also shows query limits of the flow in the debug details. Additionally, debugging now offers two more options than it did previously: Run flow as another user, and Run flow in rollback mode.

Where is the Flow Builder in Salesforce?

To find the Flow Builder in Salesforce (Lightning), navigate to Setup > Process Tools > Flows.
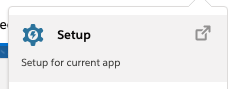
Setup.png
Screen Shot 2020-08-10 at 11.03.20 AM.png


What are the different Flow Types in Salesforce?

Auto-Launched Flows with No Flow Trigger

These flows don’t require user interaction, and they don’t support screens, local actions, choices, or choice sets. The available distribution methods available are:

  • Flow actions
  • Lightning pages
  • Lightning community pages
  • Custom Aura components
  • Custom Lightning web components
  • Custom buttons or custom links
  • Web tabs
  • Direct flow URLs
  • Visualforce pages
  • Lightning out
  • Embedded service deployments

Auto-Launched Flows with a Schedule Trigger

These flows only run from a schedule that the user sets. They don’t support user interaction, screens, local actions, choices, or choice sets. The available distribution methods are:

  • Processes
  • Custom Apex classes
  • REST API
  • Web tabs
  • Custom buttons or custom links
  • Visualforce pages

Screen Flows

Screen flows require user interaction because they include screens, local actions, steps, choices, or dynamic choices. Screen flows don’t support Pause elements. A schedule-triggered flow only runs at the scheduled time and frequency.

Auto-Launched Flows with a Record Trigger

These flows are designed to quickly make simple changes to a record when the record is created, updated, or deleted. They can also be configured to make those changes either before or after the record has been saved to the database. In a before-save flow, the supported elements are Assignment, Decision, Get Records, and Loop. After-save flows have access to all flow capabilities, but they cannot launch sub flows.

User Provisioning Flow

User provisioning flows provision users for third-party services. You could use this flow type to customize the user provisioning configuration for a connected app, linking Salesforce users with their Google Apps accounts. A user provisioning flow can only be implemented by associating it with a connected app when running the User Provisioning Wizard.

Field Service Mobile Flow

These flows require user interaction because they have one or more screens.

Field Service Embedded Flow

These flows require user interaction because they have one or more screens.

Contact Request Flow

These flows require user interaction because they have one or more screens. Use one of the following Experience Builder components to add this flow:

  • Contact Request Button & Flow (launch the flow in a popup window)
  • Flow (embed the flow directly on the page)

For more on Flow Types in Salesforce, check out the official documentation.

What is a flow interview in Salesforce?

While a flow is an application built by your administrator that asks you for inputs and does something in Salesforce based on those inputs, a flow interview is a running instance of a flow.

For example, a flow could provide a call script for customer support calls using the information you provided to create a case. What the flow does with the information you provide is entirely up to your administrator.

When you run a flow interview, whether through a link, button, or tab, you’re running a single instance of a flow. If the terminology is confusing, consider the difference between a record and an object. You create an account record, which is a single instance of the account object that your administrator customized.

It is a good idea to monitor the Paused and Failed Flow Interviews list available in Setup>Paused and Failed Flow Interviews. This pair of lists is quite helpful. The paused flow interviews lets you check in on flows with time based actions or screen flows that users have not completed. The failed flow interviews list is still more helpful as it shows you flow errors along with the debug log for the flow interview. This should be your first stop when troubleshooting a flow.

Read more about flow interviews in Salesforce’s documentation.

How do you call a flow from a button in Lightning?

Since Winter 2018, Salesforce has offered an easy way to trigger a flow using a Quick Action button in Lightning.

Note: Only screen flows or field service mobile flows may be launched from a Quick Action button.

Create a custom action for the record in question by navigating to Object Manager > (Object Name) > Buttons, Actions and Links. Select “Flow” as the type for the custom action, configure the custom action to reference the flow, then name it. Then add the custom action to the page layout of your choice.

Common mistakes made when designing flows

We see a lot of flows here at Kicksaw, and we build even more of them. Here are some common and avoidable mistakes we’ve identified:

  • Using the wrong field or variable
  • Not checking for null values
  • Putting Get, Create, Update, or Delete elements inside of a loop element
  • Referencing objects or fields that an end user may not have access to
  • No access to running flows
  • Using Get elements to get data that is available through the $Record or $RecordPrior in a record or scheduled trigger flow
  • Hardcoding record Ids

Further Salesforce flows documentation

We hope you learned a lot about the power of Salesforce flows in this article, but if you need more help, reference the official documentation.

For further learning, we also recommend completing the Build Flows with Flow Builder trail on Trailhead, and we encourage you to read more about Flow Builder.

Better yet, reach out to us by filling out the Contact Us form below! We’d love to help in any way we can.

Salesforce Flow

The use cases for Flow are endless, and its capabilities are growing with every Salesforce release. Formerly Visual Flow, Salesforce Flow has gone through significant upgrades to give us the Flow Builder interface, after being completely rebuilt from the ground up!

Today, I’ll take you through Salesforce Flow basics, and answer the following questions: What are Flows? What are Flow’s features? How can Flows be called? And finally, can Flows become the ‘one tool to rule them all’?

What are Salesforce Flows?

Flows allow you to build complex business automation using clicks instead of code. As an admin, Flows are going to be your best friend because you will be able to handle the majority of complex business requirements without the help of a Salesforce developer!

The benefit of Salesforce Flow is that they are easy to maintain because anyone (assuming they know Flows) should be able to follow along with what you built.

Flows are accessible through the Setup menu. Simply enter ‘Flows’ into the Quick Find box, and create a new Flow to get started.

Read More: Process Builder Vs Flows – Become the Ultimate Admin

There are 3 main “building blocks” of any Flow:

1. Elements are the individual building blocks of the Flow. These perform logical actions such as assignments, decisions, or loops. There are also data elements that will query the database or commit record changes.

2. Connectors determine which element leads to which. Winter ‘21 enables Auto-Layout, and connects the Elements together automatically.

3. Resources are the individual variables of data that are to be used in a Flow – these can be strings of text, numbers, records, formulae, or collections.

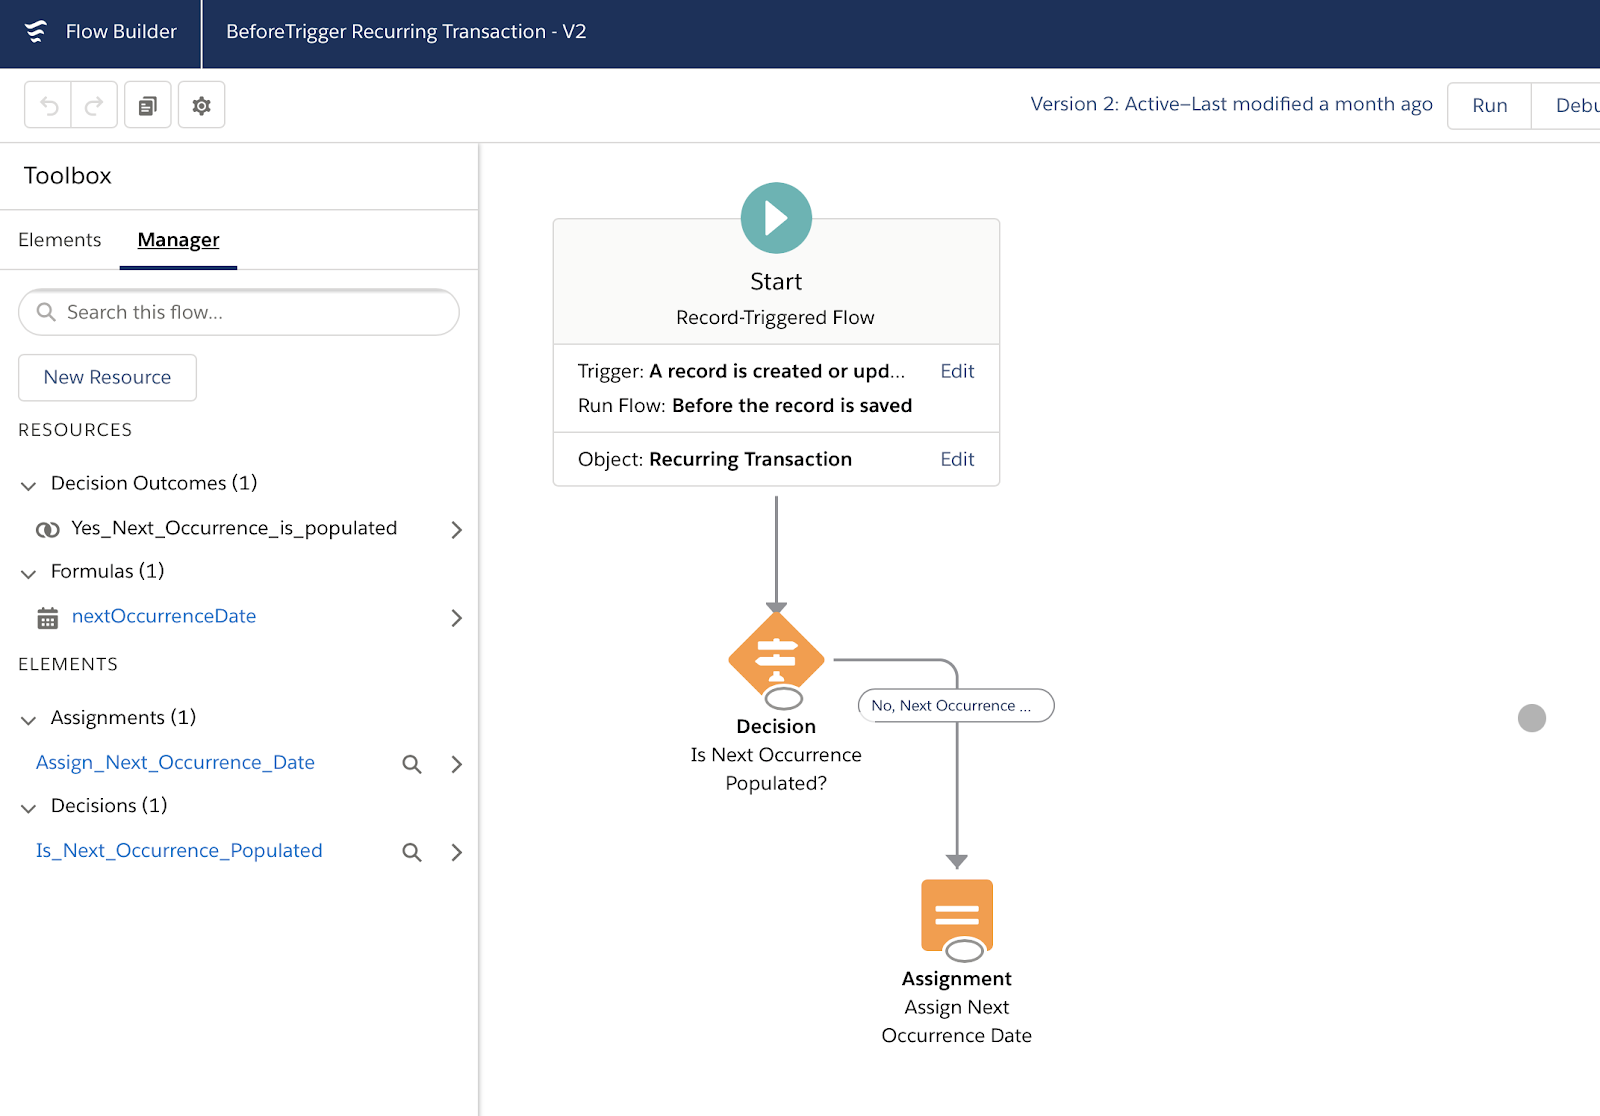
You can see these in action on the Flow Canvas below. This example Flow below is a declarative replacement for a ‘before’ trigger. In the ‘Start’ element at the top you can see that the trigger is when a record is created or edited, and it should run before the record is saved.

What Are the Basic Flow Features?

On the left-hand side of your Flow Canvas, you’ll see the Toolbox. Depending on the type of Flow that you’re working on (whether it’s a Screen Flow, Auto-Launched Flow, etc.) you’ll see a different set of tools.

Manager Tab

In the screenshot below, you can see the Manager tab that contains the existing elements and resources of the Flow (this is from an Auto-Launched Flow):

This is where your Resources are kept. Some examples of Resources are Variables, Collections, Constants, Formulae, or Choices.

  • Variables are where you can store data to use in the Flow. These can be Text, Number, Record, Dates, Currency, Boolean, or Picklists just to name a few.
  • Collections are a group, or ‘list’, of Variables stored together. Collections allow you to process multiple records at once, or ‘bulkify’ your Flows.
  • Constants are values you set once and never change. They are useful when you want to refer to a single value multiple times through your Flow – if you ever need to change that value, you just need to change it once and it is reflected throughout the Flow.
  • Formulae display a dynamic value depending on other values within your Flow. If you need to calculate a future date based on when the Flow was run, a Formula will be helpful. If you need to calculate and set a currency based on an interest rate, a Formula can be used.
  • Choices are used within Screen Elements to display an option to the user.

Elements – Interaction, Logic, Data Elements

Next, you have the Elements screen. This is where you can create new Resources and Elements in the Flow. In the screenshot below, you’ll see a ‘Screen’ element (because I took the screenshot in a Screen Flow, which will not appear in a Flow type that doesn’t support Screens, such as an Autolaunched Flow). There are a number of different elements that will dynamically show up depending on the type of Flow you’re working with.

Interaction elements include Screen, Action, or Subflow.

  • A Screen element, only available in a Screen Flow, allows you to present a screen to the user. This screen can display information from the data your Flow is working on, or it can be used to collect information from the user.
  • An Action element allows you to pass data through to a pre-existing standard or custom action such as Send Email, a Quick Create, or a custom Apex action.
  • A Subflow element allows you to call another Flow within your current Flow – this means that if you have another complex Flow set up, you don’t need to replicate the logic in your new Flow. This also makes maintenance easier as you only need to update your logic once if you design your Flows well enough!

Logic elements include Decisions, Assignments, and Loops.

  • Decisions allow you to split your Flow depending on the data that’s being sent through it.
  • Assignments allow you to give a value to a variable.
  • Loops allow you to handle multiple variables at once using collections.

Data elements include Create, Update, Get, or Delete records.

Essentially, any time you want to edit a record in the Salesforce database, you’ll need to use one of these Data elements. These will also dynamically display depending on the type of Flow you’re running. If you’re running a ‘before triggered’ Flow, you’ll only be able to use ‘Get’, for example.

How Do You Call a Flow in Salesforce?

To ‘call’ a Flow means that something happens in order to kickstart the Flow process. This could be a Salesforce record change, from another process in Apex/Process Builder, or automated on a recurring schedule.

When you create a new Flow, you’re prompted to select the type of Flow you wish to create.

  • A Screen Flow is called through a button or action, or displayed in a Lightning Page or the Utility Bar, and appears as a screen to the user to interact with. This cannot be automatically called.
  • A Schedule-Triggered Flow runs automatically to a recurring schedule. This is handy for tasks that need to be performed daily on a set of records, or to handle jobs that run frequently.
  • Autolaunched Flows are called through Apex, Process Builder, or another Flow. They can be used to perform actions automatically behind the scenes.
  • Record-Triggered Flows begin when a record is created or updated, very similar to Process Builder (more on this later).
  • Platform Event-Triggered Flows are called when a platform event is received, similar to an Autolaunched Flow.

Can Flows Be the ‘One Tool to Rule Them All’?

This is a question that I’ve been wondering about, each time Salesforce announcements huge amounts of updates for Flow in every release. But my suspicious have been confirmed. At Dreamforce ’21, Salesforce announced that Workflow rules & Process Builders will be retired, and Flow will be the only declarative automation solution on the platform.

Overall, I think this is inevitable. Salesforce has not updated the functionality of other automation solutions in many years, and due to Flow having “Apex code” like functionality, it’s by far the most powerful automation tool.

By learning and adopting Flow, you are able to help your business beyond what a declarative Salesforce Admin would have been able to do before. This means you can bring value faster to your business, without the need for expensive developers.

Summary

Today, I have taken you through the basics of Salesforce Flows to answer what Flows are, the features, and how Flows can be called. Finally, I shared my thought on why Flows could become the ‘one tool to rule them all’.

As you can see, Salesforce Flow is a powerful tool that empowers admins to build complex business solutions, possibly the most powerful tool that a Salesforce Admin has at their disposal! The use cases for Flow are endless, and its capabilities are growing with every Salesforce release.

I can’t stress enough just how much learning Flow Designer (back in the day) changed how I viewed Salesforce. I learnt that I could build a functional business system without having to learn Apex, and I could quickly assist department heads to implement custom logic in a few hours. I would recommend learning Flows to absolutely any admin who uses Salesforce (and I do!). That said, with great power comes great responsibility! There are a number of best practices that need to be followed to ensure your Flows are future proof and scalable (something we’ll go through in another post!)

Tuesday, August 8, 2023

How Salesforce Flows Work

Salesforce Flow represents the future of automation in the Salesforce platform. Growing out of Salesforce’s Process Builder and Workflow features, Salesforce Flow allows you to automate complex business processes and manual data entry.

Saturday, July 29, 2023

Data Security

Salesforce security interview questions

Salesforce security interview questions or data and security salesforce interview questions

There are different levels of security that is implemented in Salesforce. This post is related to data and security.

What are different Levels of data access in Salesforce?

Organization level security

For your whole org, you can maintain a list of authorized users, set password policies, and limit logins to certain hours and locations.

Object level security

Access to object-level data is the simplest thing to control. By setting permissions on a particular type of object, you can prevent a group of users from creating, viewing, editing, or deleting any records of that object. For example, you can use object permissions to ensure that interviewers can view positions and job applications but not edit or delete them.

Field level security

You can restrict access to certain fields, even if a user has access to the object. For example, you can make the salary field in a position object invisible to interviewers but visible to hiring managers and recruiters.

Record level security

You can allow particular users to view an object, but then restrict the individual object records they’re allowed to see. For example, an interviewer can see and edit her own reviews, but not the reviews of other interviewers. You can manage record-level access in these four ways.

  • Organization-wide defaults
  • Role hierarchies
  • Sharing rules
  • Manual sharing


Salesforce security interview questions

Salesforce security interview questions

What is Organization-wide defaults?

Organization Wide Defaults(OWD) in salesforce is the baseline level of access that the most restricted user should have. Organizational Wide Defaults are used to restrict access. You grant access through other means like(sharing rules, Role Hierarchy, Sales Teams and Account teams, manual sharing, Apex Sharing ). In simple words Organization Wide Defaults(OWD) specify the default level of access users have to each other’s records.

For more details please level to below post Organization Wide Defaults(OWD) in salesforce

What is role hierarchy?

It gives access for users higher in the hierarchy to all records owned by users below them in the hierarchy. Role hierarchies don’t have to match your organization chart exactly. Instead, each role in the hierarchy should represent a level of data access that a user or group of users needs.

What are Sharing Rules?

Sharing Rules are automatic exceptions to organization-wide defaults for particular groups of users, so they can get to records they don’t own or can’t normally see. Sharing rules, like role hierarchies, are only used to give additional users access to records. They can’t be stricter than your organization-wide default settings.

What is Manual sharing?

It allows owners of particular records to share them with other users. Although manual sharing isn’t automated like org-wide sharing settings, role hierarchies, or sharing rules, it can be useful in some situations, such as when a recruiter going on vacation needs to temporarily assign ownership of a job application to someone else.

Some more questions for Salesforce security interview questions post.

What is Profile

Each user has a single profile that controls which data and features that user has access to. A profile is a collection of settings and permissions. Profile settings determine which data the user can see, and permissions determine what the user can do with that data.
  • The settings in a user’s profile determine whether she can see a particular app, tab, field, or record type.
  • The permissions in a user’s profile determine whether she can create or edit records of a given type, run reports, and customize the app.

Profiles usually match up with a user’s job function (for example, system administrator, recruiter, or hiring manager), but you can have profiles for anything that makes sense for your Salesforce org. A profile can be assigned to many users, but a user can have only one profile at a time.

What are standard profiles?

  • Read Only
  • Standard User
  • Marketing User
  • Contract Manager
  • System Administrator


What is Permission Set?

A permission set is a collection of settings and permissions that give users access to various tools and functions. The settings and permissions in permission sets are also found in profiles, but permission sets extend users’ functional access without changing their profiles.

Permission sets make it easy to grant access to the various apps and custom objects in your org, and to take away access when it’s no longer needed.

Users can have only one profile, but they can have multiple permission sets.


What is “View all” and “Modify all” permission?

View all and Modify all permissions are usually given to system administrator. When you grant “View All” or “Modify All” for an object on a profile or permission set, you grant any associated users access to all records of that object regardless of the sharing and security settings.

In essence, the “View All” and “Modify All” permissions ignore the sharing model, role hierarchy, and sharing rules that the “Create,” “Read,” “Edit,” and “Delete” permissions respect. Furthermore, “Modify All” also gives a user the ability to mass transfer, mass update, and mass delete records of that specific object, and approve such records even if the user is not a designated approver.

These tasks are typically reserved for administrators, but because “View All” and “Modify All” let us selectively override the system, responsibilities that are usually reserved for the administrator can be delegated to other users in a highly controlled fashion.


Refer by:   https://trailhead.salesforce.com/content/learn/modules/data_security 

Tuesday, July 11, 2023

Salesforce cpq

Package Setting & Products

  • Update Package Settings
  • Update Product Fields

Creating Quote

  • Creating an Account, Contact, Opportunity and Quote

Configuration

  • Product Bundle Settings
  • Create Features for a Bundle
  • Create Product Options for a Bundle
  • Create Option Constraints for a Bundle
  • Create Configuration Attributes for a Bundle
  • Update Product Fields

Product Rules

  • Create Product Rule
  • Create Selection Product Rules
  • Create Validation Product Rule
  • Configuration Attributes
  • Rules with Lookup Queries
  • Update Product Fields

Dynamic Bundles

  • Create a Dynamic Bundle

Custom Actions

  • Create Custom Action
  • Default Custom Action

Pricing

  • Price Waterfall
  • Manual Discounting
  • Create a Discount Schedule
  • Pricing Methods
  • Contracted Pricing
  • Subscription Pricing
  • Multi-Dimensional Quoting

Quote Templates

  • Quote Template
  • Template Sections
  • Template Content
  • Quote Terms

Advanced Approval

Price Rules

Guided selling

Contract

Amendment